Introduction
There are lots of simple Ethereum Hello World tutorials around to cater for everyone’s level. This tutorial builds on a 2016 version by Karl Floersh and attempts to keep things very simple. All that is required to be installed is Meta Mask which is currently a Chrome only plugin and is essentially an Ethereum light client browser plugin.
More formally:
“MetaMask is a bridge that allows you to visit the distributed web of tomorrow in your browser today. It allows you to run Ethereum dApps right in your browser without running a full Ethereum node.“
Outcome
To deploy a hello world smart contract on the Ethereum network. Here is the code. It’s 1 contract consisting of 1 function and 1 event.
contract HelloWorld {
    event log_string(bytes32 log); // Event

    function () { // Fallback Function
        log_string("Hello World!");
    }
}
This guide should only take about 10 minutes to follow.
Step 1: Install MetaMask
In Chrome, search for MetaMask and install it as a plugin. Then create an account and change the network to Ropsten. This is the test network.

In order to get some test ether, click “BUY” and click “Ropsten test Faucet”.
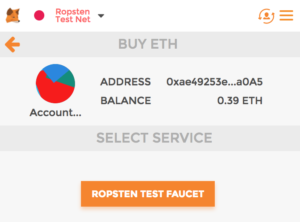
This will take you to https://faucet.metamask.io/ where you can “request 1 ether from faucet”.
Step 2: The Hello World code
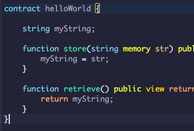
Once you have MetaMask installed and managed to get some test ether, the next step is to compile the hello world code provided. Let’s understand the code first:
contract HelloWorld {
    event log_string(bytes32 log); // Event

    function () { // Fallback Function
        log_string("Hello World!");
    }
}
The first line declares a contract called HelloWorld. Next, an event is defined and accepts 1 argument of type bytes32. A function is then declared that invokes the event.
For more info about events check out:
https://media.consensys.net/technical-introduction-to-events-and-logs-in-ethereum-a074d65dd61e
https://ethereum.stackexchange.com/questions/11228/what-is-an-event
http://solidity.readthedocs.io/en/develop/contracts.html#events
Step 3: Compile and deploy the code
We will use the very popular online IDE (Integrated Development Environment) called Remix at http://remix.ethereum.org/. Copy and paste the code in and click Run > Create

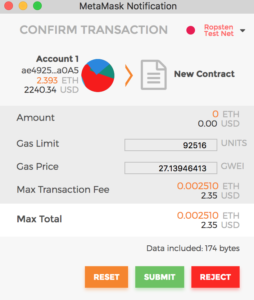
A MetaMask notification will then appear. Click Submit to deploy the contract to the Ropsten blockchain.
Step 4: View the deployed contract
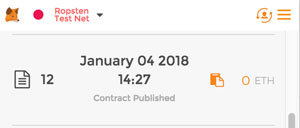
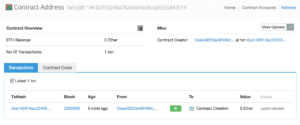
Open MetaMask again and wait a few minutes for the contact to be deployed. Then click on it to open up the contract in Etherscan.

This is what it should look like: https://ropsten.etherscan.io/tx/0xa142914ac224047fbf39a3b2ed92a68bc24fd301466d059fbe0e7810bdc8e5e9
Congratulations. You have just deployed a very simple Hello World smart contract.
Step 5: Invoke the contract
The contract is now alive on the Ethereum blockchain. The final question is how to we interact with it or trigger it.
This is where we go back to MetaMask and send a transaction to the contract. First get the contract address. Look for the To field in the original contract deployed link at https://ropsten.etherscan.io/tx/0xa142914ac224047fbf39a3b2ed92a68bc24fd301466d059fbe0e7810bdc8e5e9
![]()
In my case it is: 0xfd3811943d7e924607a2443465bc5deeb5847e14
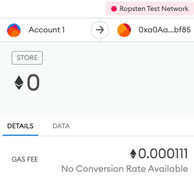
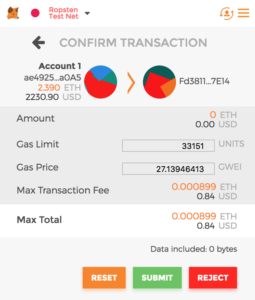
In MetaMask, click send and use the contract address as the Recipient Address. Leave the other fields as is and click Next.

Again, leave all the default values as is and click Submit.
Wait a few minutes for the transaction to go through and then check the Event Log of the transaction.

https://ropsten.etherscan.io/tx/0x6b7f88e9590ec5af87133394d1301bbe4df736a66aff9c9519605f6a9dc4b0a7#eventlog

The data field will be in hexidecimal. Change this to text and it should read “Hello World”!

Summary
There are so many ways to deploy a smart contract. This guide used an online development environment in conjunction with a Chrome plugin called MetaMask to deploy a simple Hello World smart contract to the Ethereum testnet blockchain.
The idea was to get up and going quickly with the minimum of moving parts.
Ref: https://karl.tech/learning-solidity-part-1-deploy-a-contract/