
At first, it may sound confusing but running an indexer is synonymous to running a node which will “index” the blockchain and store the data in a database. To be more precise, the @subql/node implementation will extract substrate-based blockchain data (aka on the PolkaDot network) and save it into a Postgres database.
Currently you don’t “join” a network. You create a SubQuery project and “run” it.
Postgres
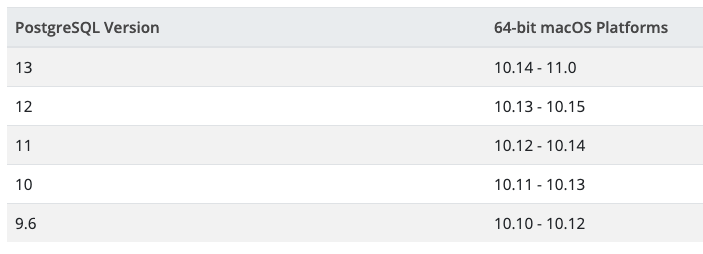
The first thing you will need to do is to install Postgres. Visit https://www.postgresql.org/download/ and install version 12 or higher.
SubQuery node
To install the SubQuery node application, run
npm install -g @subql/nodeThe -g flag means to install it globally which means on OSX, the location will be /usr/local/lib/node_modules
Once installed, check out the possible flags with the help command.
> subql-node --help
Options:
      --help                Show help                                  [boolean]
      --version             Show version number                        [boolean]
  -f, --subquery            Local path of the subquery project          [string]
      --subquery-name       Name of the subquery project                [string]
  -c, --config              Specify configuration file                  [string]
      --local               Use local mode                             [boolean]
      --batch-size          Batch size of blocks to fetch in one round  [number]
      --timeout             Timeout for indexer sandbox to execute the mapping
                            functions                                   [number]
      --debug               Show debug information to console output. will
                            forcefully set log level to debug
                                                      [boolean] [default: false]
      --profiler            Show profiler information to console output
                                                      [boolean] [default: false]
      --network-endpoint    Blockchain network endpoint to connect      [string]
      --output-fmt          Print log as json or plain text
                                           [string] [choices: "json", "colored"]
      --log-level           Specify log level to print. Ignored when --debug is
                            used
          [string] [choices: "fatal", "error", "warn", "info", "debug", "trace",
                                                                       "silent"]
      --migrate             Migrate db schema (for management tables only)
                                                      [boolean] [default: false]
      --timestamp-field     Enable/disable created_at and updated_at in schema
                                                       [boolean] [default: true]
  -d, --network-dictionary  Specify the dictionary api for this network [string]
#Connecting to a database
Use the export command to set the environment variables as shown below.
export DB_USER=postgres
export DB_PASS=postgres
export DB_DATABASE=postgres
export DB_HOST=localhost
export DB_PORT=5432
Typing “env” should list your current environment variables and note that these variables are only set temporarily. In other words, they are only valid for the duration that the terminal window is open for. You can make it more permanent by creating these in your ./bash_profile.
Starting a project
To start a project, use the -f flag.
subql-node -f <project_path>For example,
subql-node -f . //for current directory
subql-node -f ./helloworld // for helloworld directory

2021-08-09T23:24:08.778Z <fetch> INFO fetch block [6401,6500], total 100 blocks
2021-08-09T23:24:11.807Z <fetch> INFO fetch block [6501,6600], total 100 blocks
Postgres
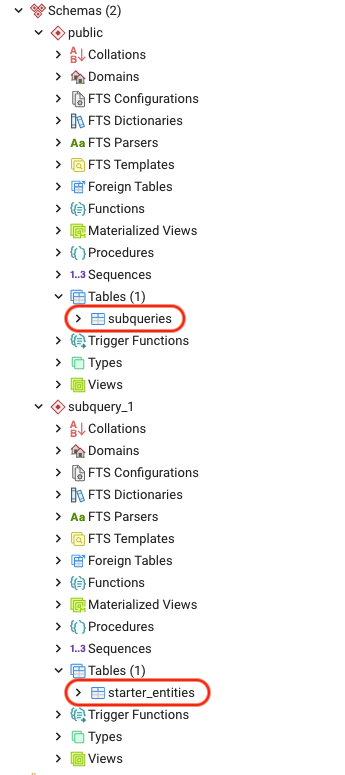
If you open up Postgres, you’ll see that two tables are created. public.subqueries and subquery_1.starter_entities
The starter_entities table contains the indexes. To view the data, run:
select * from subquery_1.starter_entities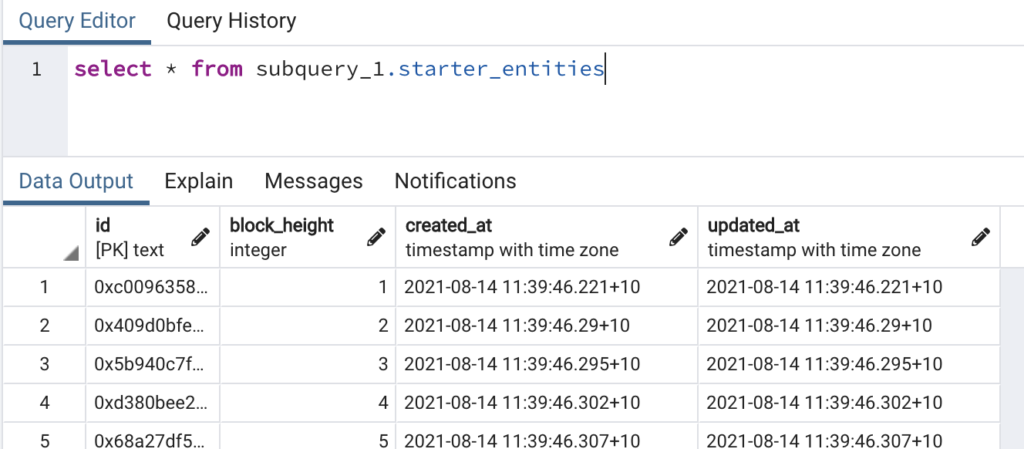
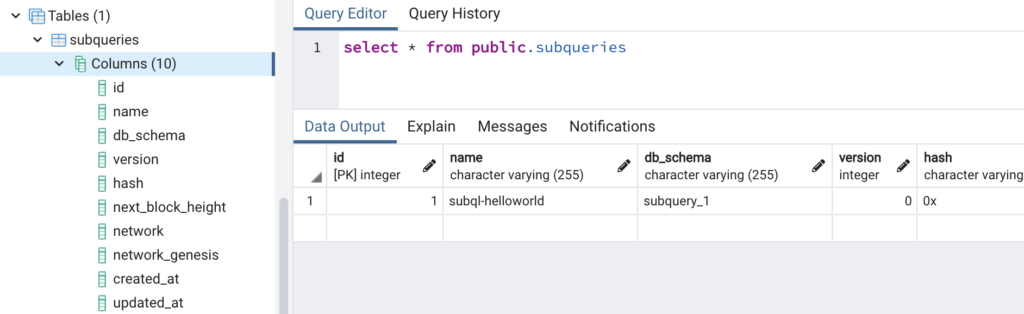
public.subqueries only contains 1 row which the node checks upon start up to “understand the current state” so it knows where to continue from so to speak.
SubQuery query service
Now that we have the node running, the next step is to get the query service up and running. Run:
npm install -g @subql/queryTo start the service, run:
subql-query --name subql-helloworld --playgroundIf you get this error message, “Error: SASL: SCRAM-SERVER-FIRST-MESSAGE: client password must be a string”, this means that you need to set your DB_PASS again. This could be the result of you opening up another terminal meaning the environment variables need to be set again.
Also make sure to set your DB_USER via:
export DB_USER=postgresThe next error you will probably encounter is “Error: listen EADDRINUSE: address already in use :::3000”.
Set a different PORT variable via:
export PORT=3001You should then see:
~/Code/subQuery/projects/subql-helloworld$ export PORT=3002
~/Code/subQuery/projects/subql-helloworld$ subql-query --name subql-helloworld --playground
(node:20940) [PINODEP007] Warning: bindings.level is deprecated, use options.level option instead
(Use `node --trace-warnings ...` to show where the warning was created)
2021-08-14T02:29:58.525Z <nestjs> INFO Starting Nest application...
2021-08-14T02:29:58.534Z <nestjs> INFO AppModule dependencies initialized
2021-08-14T02:29:58.534Z <nestjs> INFO ConfigureModule dependencies initialized
2021-08-14T02:29:58.534Z <nestjs> INFO GraphqlModule dependencies initialized
⚠️ WARNING⚠️  You requested to use schema 'subquery_1'; however we couldn't find some of those! Missing schemas are: 'subquery_1'
2021-08-14T02:29:58.752Z <nestjs> INFO Nest application successfully started
(node:20940) [PINODEP007] Warning: bindings.level is deprecated, use options.level option instead
Then navigate to http://localhost:3002/ and you should see….
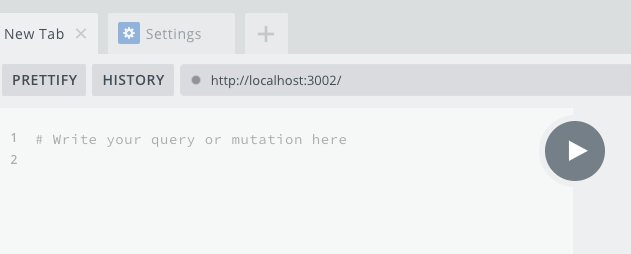
Then run your query as normal.