If you followed part 1 of creating smart contracts on Ethereum and you got the contract running successfully then congratulations. Here in part 2, I’ll go through how you can get the same smart contract working on a real blockchain. The Ethereum testnet blockchain instead of testrpc which is like an in memory private blockchain simulator.
Step 1: Download geth
The first step is to download geth (basically Ethereum that is written in Go). This is the Ethereum client that is going to run the Ethereum blockchain. Here are the instructions for OSX
> brew tap ethereum/ethereum

> brew install ethereum
(From: https://github.com/ethereum/go-ethereum/wiki/Installation-Instructions-for-Mac)
Then run it with:
> geth --testnet
and leave this terminal open. If you forget the testnet flag, you’ll end up downloading the real chain. ie THE Ethereum blockchain.
Step 2: Download Mist (optional)
I found downloading Mist convoluted but it gave me a chance to really learn how things worked. Mist is a graphical application that contains geth and an Ethereum wallet. This was confusing at first because you can also download an Ethereum wallet by itself.
The advantage of Mist is that you can see the accounts, create new accounts and practice transferring ether all quite easily and it provides something different that a traditional terminal screen.
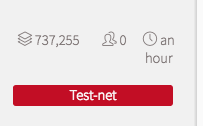
The end goal is basically to sync/download all the blocks from testnet.
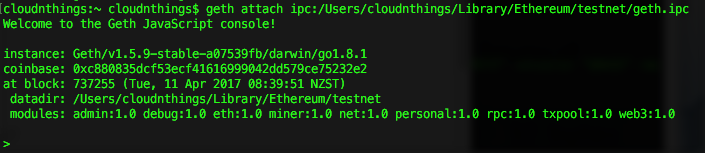
Step 3: Attach geth
The next step is to open a new terminal screen and run this command
> geth attach ipc:/Users/cloudnthings/Library/Ethereum/testnet/geth.ipc
If you don’t specify the ipc, you’ll get this error: “Fatal: Unable to attach to remote geth: dial unix /Users/cloudnthings/Library/Ethereum/geth.ipc: connect: no such file or directory”
The geth.ipc file is created automatically by Ethereum at run time. See here for more info.
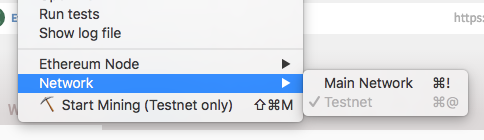
Here is a neat little trick. If you run Mist (the GUI) and have it set to testnet, you don’t have to specify the ipc part. Just run “geth attach”.
Step 4: Get some test ether
You will have to start mining to get some test ether to continue. Here are some helpful commands to know.
> eth.accounts
will show you your Ethereum accounts address. ie the place where your ether will be stored.
> eth.getBalance(eth.accounts[0])
will show you the balance.
> miner.start()
will start mining in testnet to get some fake ether for you to deploy a smart contract. This can take up to 20 mins where you should receive 5 ether.

Once you have some test ether you can move to the next step.
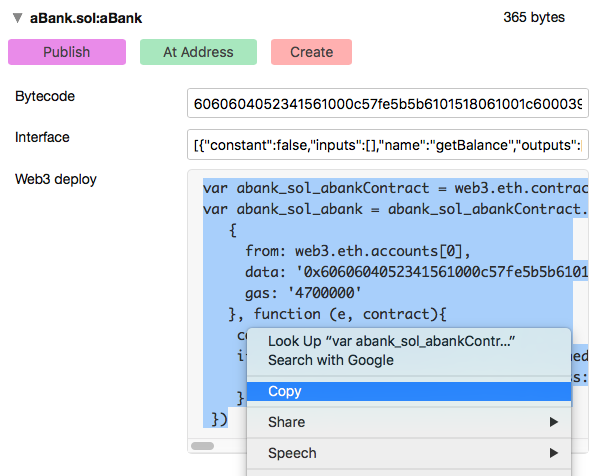
Step 5: Deploy your smart contract
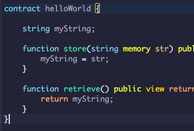
Here comes the exciting part! Go to Remix, the online solidity browser based compiler and copy the code in the “web3 deploy” box and paste it into the geth terminal.
You will probably get this error:
> Error: authentication needed: password or unlock undefined
You need to run:
> personal.unlockAccount("0xc880835dcf53ecf41616999042dd579cexxxxx", "nasa")
where the 2 parameters are your account address as hex and the account name.
When it works, you’ll get this super as success message that will leave you in no doubt that it has worked.
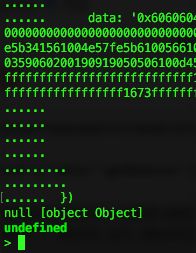
Now wait. You need to wait for the contract to be mined. This is where it could take anywhere from 10 seconds to who knows how long.
This was the most frustration part. I got plenty of potential rewrite attack errors. I had to restart geth –testnet many times in the hope I would connect to good peers.
I0411 10:19:27.571645 eth/downloader/downloader.go:326] Block synchronisation started
I0411 10:19:30.343419 eth/downloader/downloader.go:723] Peer 80fe705178b56fab [hs 0.00/s, bs 0.00/s, rs 0.00/s, ss 0.00/s, miss 0, rtt 20s]: potential rewrite attack: #647255 [00000000…] <= #647255 limit
I0411 10:19:42.826318 eth/downloader/downloader.go:723] Peer 26f7061de8ba4ee6 [hs 0.00/s, bs 0.00/s, rs 0.00/s, ss 0.00/s, miss 0, rtt 20s]: potential rewrite attack: #647255 [00000000…] <= #647255 limit
I0411 10:20:13.009870 eth/downloader/downloader.go:723] Peer 26f7061de8ba4ee6 [hs 0.00/s, bs 0.00/s, rs 0.00/s, ss 0.00/s, miss 0, rtt 20s]: potential rewrite attack: #647255 [00000000…] <= #647255 limit
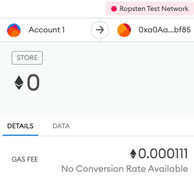
Step 6: Test it out
The step you’ve all been waiting for. Once your contract has been mined, you can start calling the functions.
Useful geth commands
> eth.syncing
> eth.blockNumber
> net.peerCount
> net.listening
> admin.peers