
SubQuery provides a very convenient service where you can host your projects for free and the best part about it is that you can get it up and running in less than 5 minutes.
Pre-requisites
You will have wanted to have gone through the Part 1: Subql Hello World in less than 5 mins tutorial first because tutorial is exactly the same except for the last step. Instead of running the query in Docker, we will run it in SubQuery.
You will also need a GitHub account and have pushed your code to a repository. This is because SubQuery will read your code from GitHub.
Set up GitHub
Log into your GitHub account and create a repository by clicking on “new” in the repository tab.

Provide a repo name and choose your visibility and initialisation preference. I’ve left everything as the default for now.
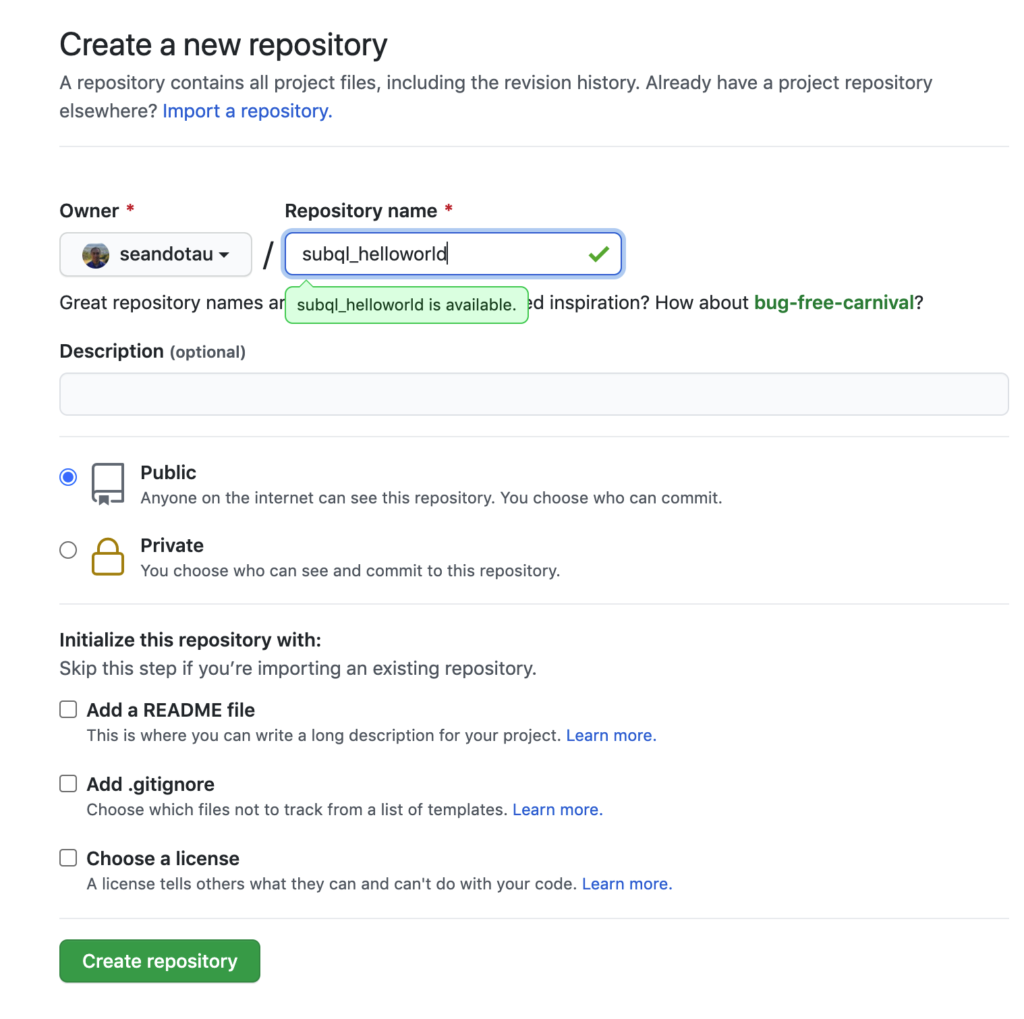
Then hit “Create repository”.
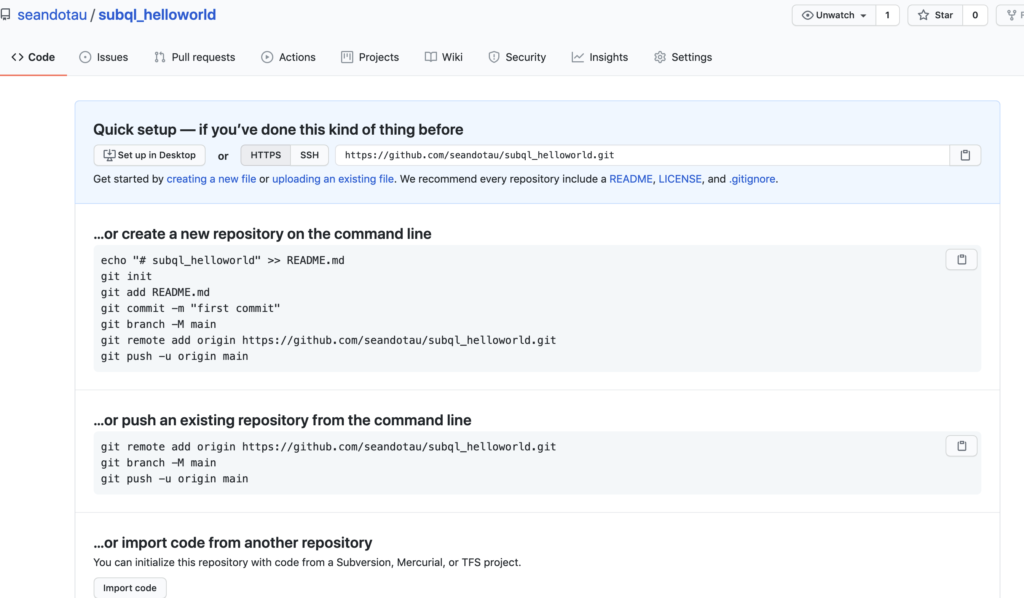
Once you have this repository, we’ll create our template starter project and push it to this repo.
Create your project
Next, let’s create a starter project template with the following command:
subql init --starter subql_helloworld!You don’t have to make the project name the same as the repository name but I find that it helps. Then run the obligatory install, codegen and build.
yarn install
yarn codegen
yarn build
Do NOT run the Docker commands. Note, if you are not familiar with the above, please check out Part 1: Subql Hello World in less than 5 mins and Part 2: Understanding Subql Hello World in more depth first.
Push your code to GitHub
Now comes the fun part. You will have to push your code to GitHub. You can do this in several ways. Either with command line or your favourite Git client such as Sourcetree or Fork. I’ll use command line here.
In your subql_helloworld directory, if you run any git command such as git push or git remote, you’ll get this error:
~/Code/subQuery/subql_helloworld$ git remote
fatal: not a git repository (or any of the parent directories): .git
This is because git does not recognise this directory. To fix this error, let’s initialise this directory with the command:
git initNow if you run git remote, nothing will happen but your error should have disappeared.
Next you want to add a remote repository by running:
git remote add origin https://github.com/seandotau/subql_helloworld.git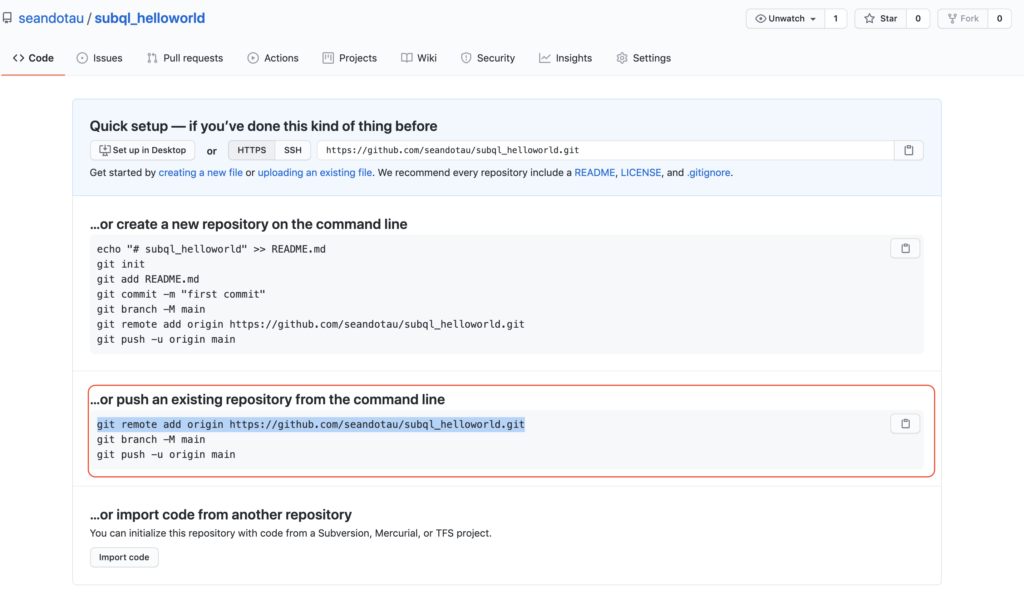
This basically sets your remote repository to “https://github.com/seandotau/subql_helloworld.git” and gives it the name “origin” which is the standard nomenclature for a remote repository in GitHub.
Running git remote again should show the following:
~/Code/subQuery/subql_helloworld$ git remote
origin
Now let’s create a branch called main. Sometimes this is referred to as “master” but we’ll use the GitHub terminology here.
git branch -M mainNow, if you try and run git push -u origin main you’ll most likely get the following error:
~/Code/subQuery/subql_helloworld$ git push origin main
error: src refspec main does not match any.
error: failed to push some refs to 'https://github.com/seandotau/subql_helloworld.git'
This will be because we have not committed anything to our local repository. Let’s run:
git add . // this adds everything to our local git repo
git commit -m "Our first commit" // commit to our local repo with a comment.
Now you can run git push origin main. This means please push my code TO the origin repo FROM my main local repo.
~/Code/subQuery/subql_helloworld$ git push origin main
Enumerating objects: 14, done.
Counting objects: 100% (14/14), done.
Delta compression using up to 12 threads
Compressing objects: 100% (13/13), done.
Writing objects: 100% (14/14), 59.35 KiB | 8.48 MiB/s, done.
Total 14 (delta 0), reused 0 (delta 0)
To https://github.com/seandotau/subql_helloworld.git
 * [new branch]      main -> main
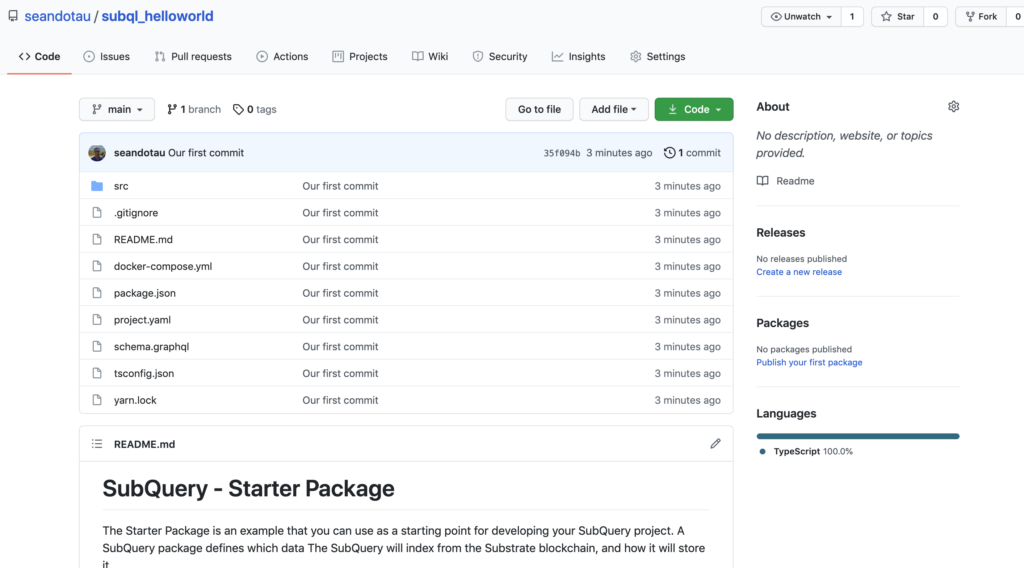
Now if you refresh your GitHub repo, you should see code!
Now that you have got your code into GitHub, we can start the real tutorial! 🙂
Hosting a SubQuery project in SubQuery
As mentioned here, very often it’s the preparation that takes the most time. The actual “cooking” is quick. So let’s start cooking!
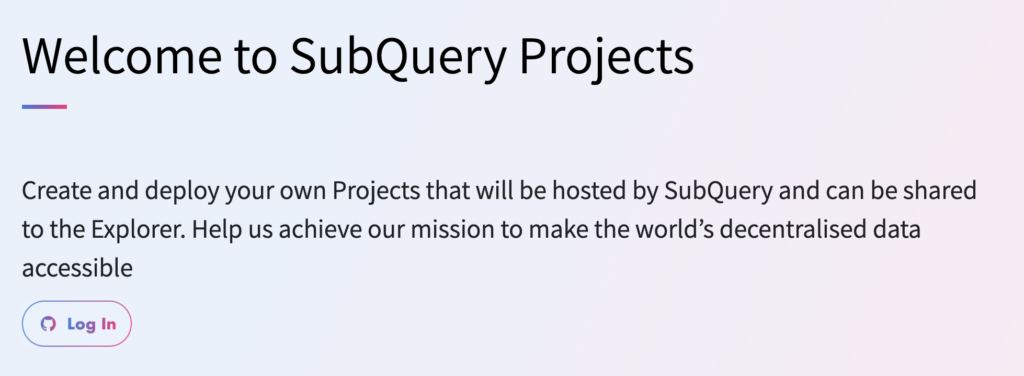
Navigate to https://project.subquery.network/ and log in.
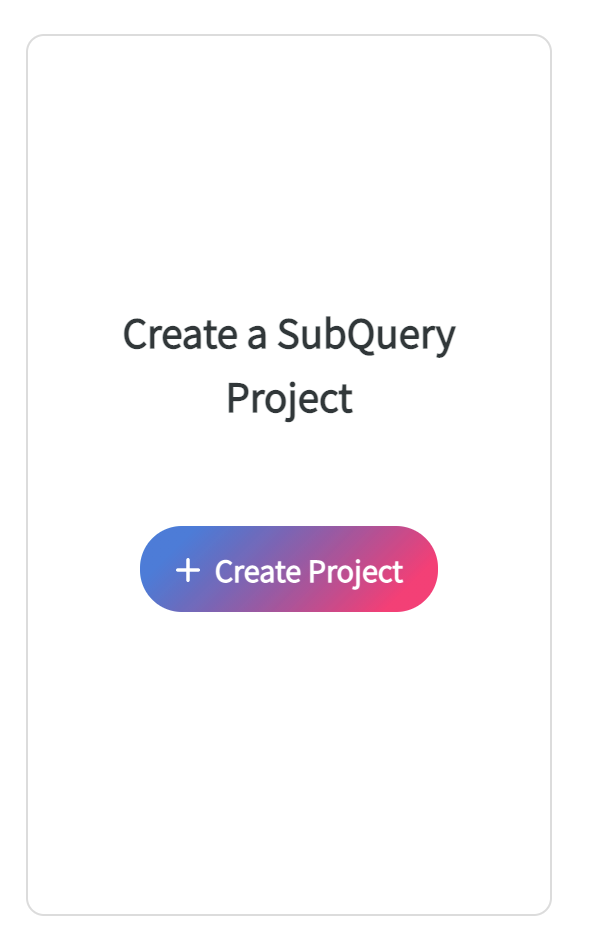
Then click “Create Project”.
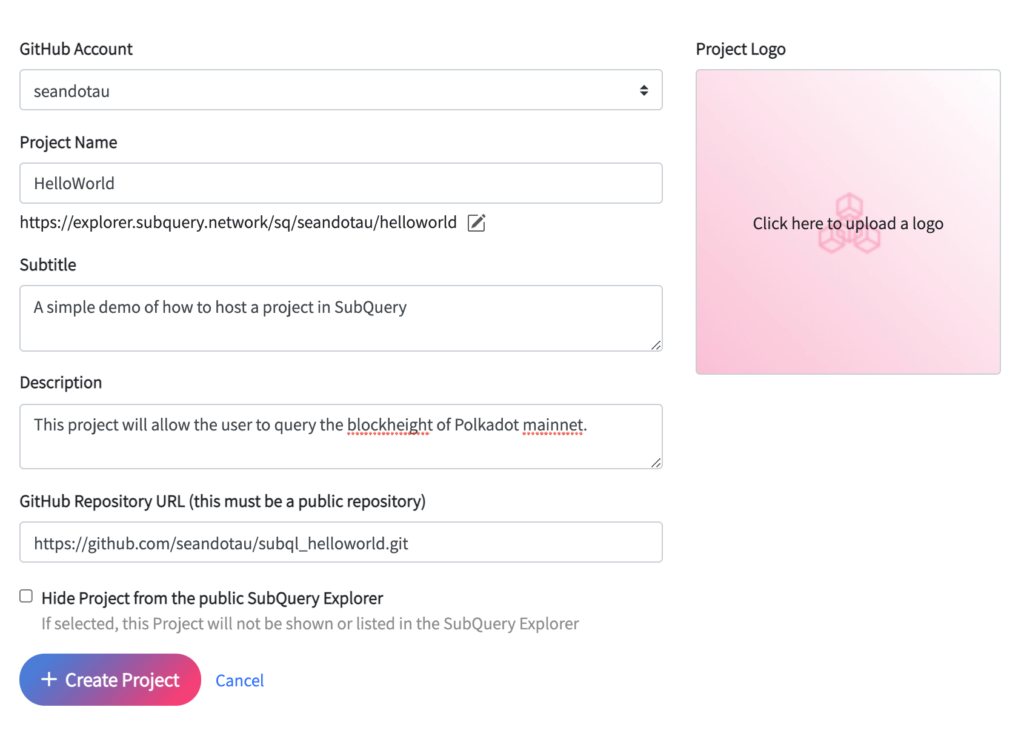
Now you’ll want to fill in the various information.
Then deploy a slot. Here we choose production, but it could also be staging as well.
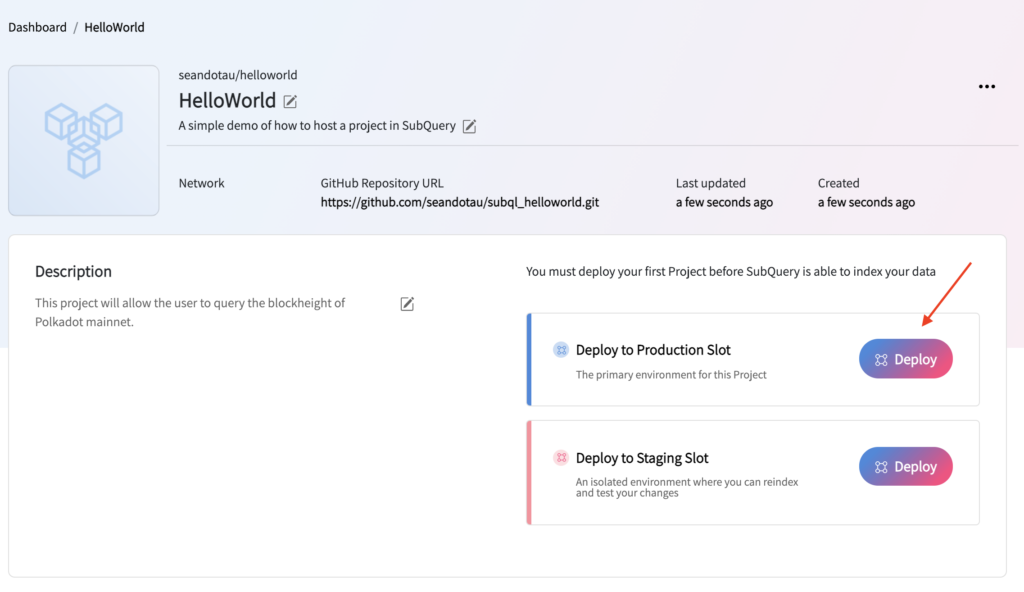
Then you can choose more options.
Commit Hash of new Version: This allows you to choose which version in your GitHub you wish to deploy. We only have 1 version here so the dropdown doesn’t contain any other version.
Indexer Version and Query Version we’ll leave as default but typically if you want to run your project against a specific older version, you can. Then hit deploy update.
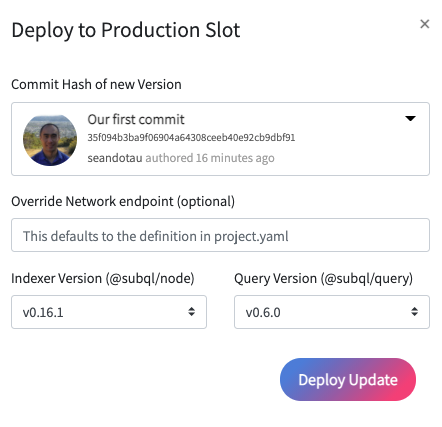
You’ll then see your deployment in “Processing” status. Here, your code is getting deployed onto the SubQuery infrastructure. Basically a server is getting spun up on demand and being provisioned for you. This will take a few minutes so time to grab a coffee!
Testing your hosted SubQuery deployment
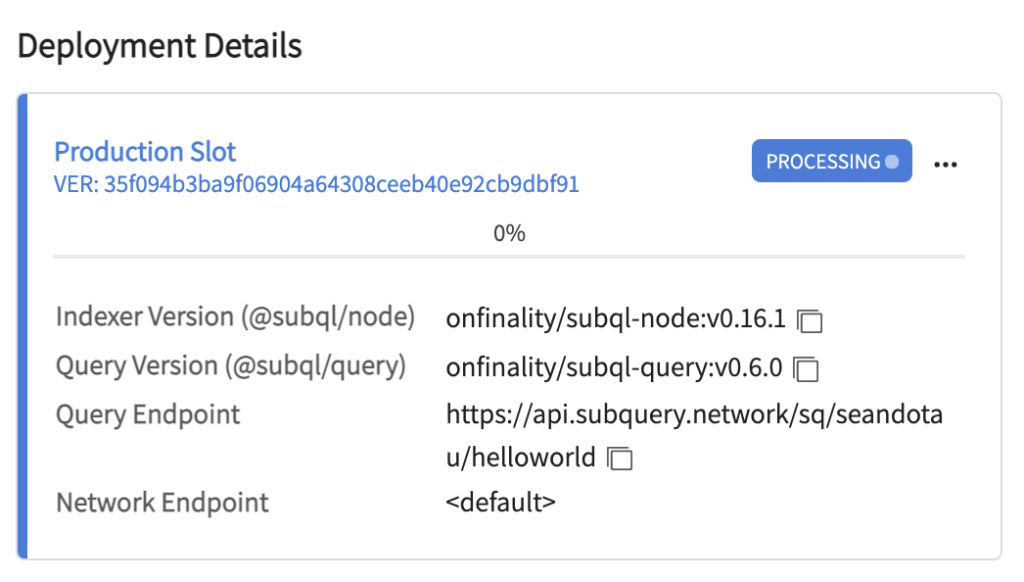
After a few minutes, you should see your status as “running”.
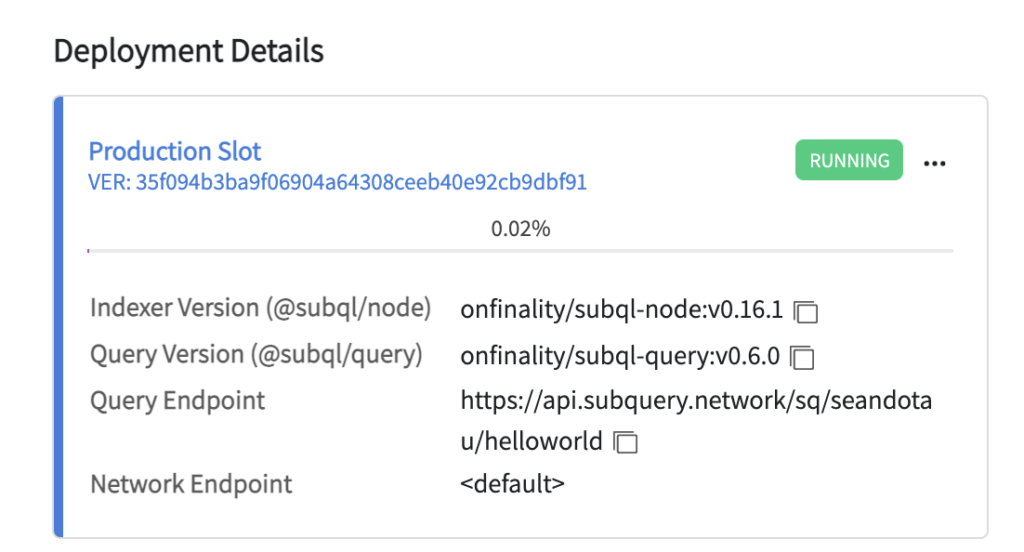
Now comes the tricky part. You need to click on the 3 ellipses and select “View on SubQuery Explorer”.
This then takes you to the familiar “Playground” where if you hit the “play” button you should see some results returned.
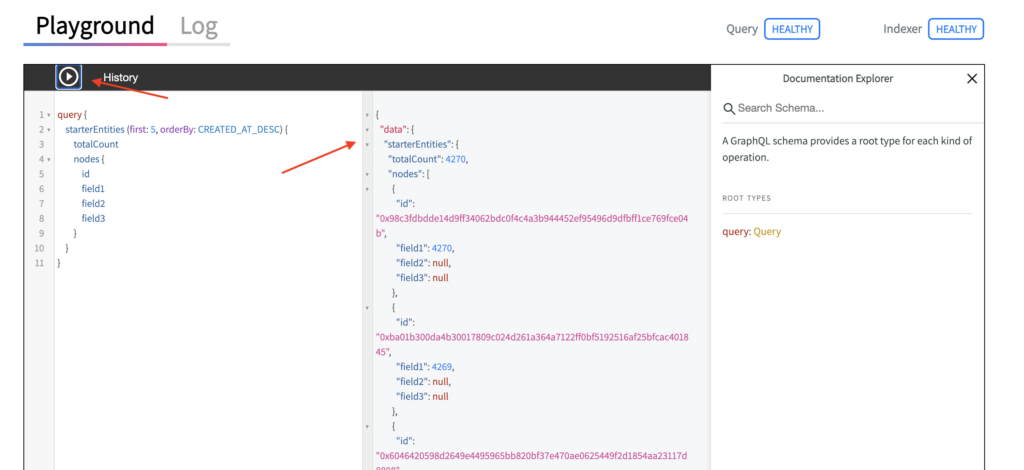
There is also a neat status section which shows the total entities, the number of entities synced and the % of synching complete

Extra bonus
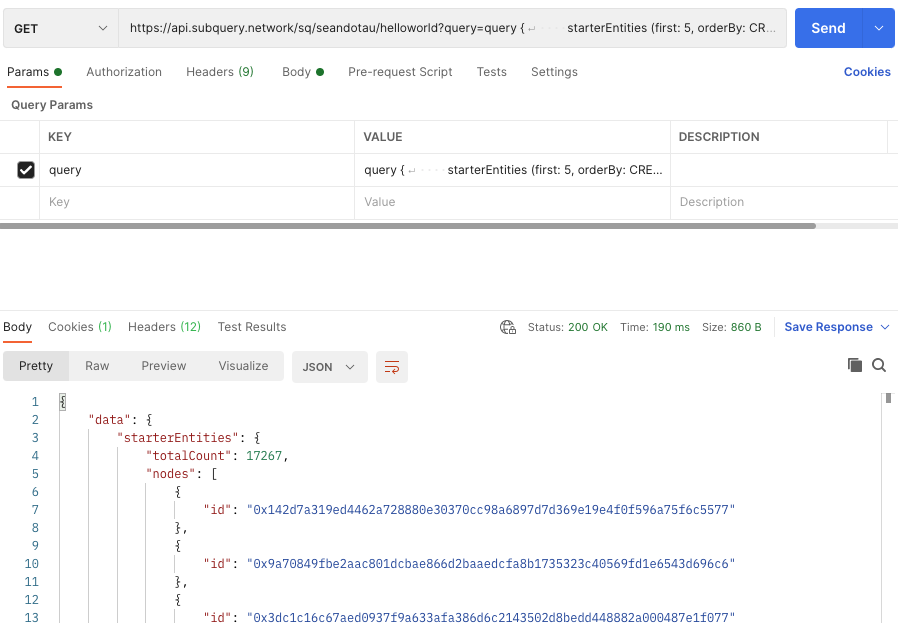
For those of you who might be wondering how to integrate this to your front end, you may have noticed in the Deployment Details section that you have a “Query Endpoint”. For me it was: https://api.subquery.network/sq/seandotau/helloworld. (It is also displayed in the playgrounds page).
This endpoint will allow you to write a GET query to fetch the data. To do this, take the query from your playground, ie
query {
    starterEntities (first: 5, orderBy: CREATED_AT_DESC) {
        totalCount
        nodes {
            id
        }
    }
}
and paste it into an application like Postman.
You can also use cURL via command line as well.
~/Code/subQuery/subql_helloworld$ curl https://api.subquery.network/sq/seandotau/helloworld -d "query=query {
>     starterEntities (first: 5, orderBy: CREATED_AT_DESC) {
>         totalCount
>         nodes {
>             id
>         }
>     }
> }"
{"data":{"starterEntities":{"totalCount":27388,"nodes":[{"id":"0xffdcf133349354ce2ac53a4bee4941863e5cc378aed3c2425284dc070b9368a4"},{"id":"0x531b88d92db3fd03e9840680496978619c0dfa8225caa23c8aa2754215494804"},{"id":"0x9b1d7d32c7b282b53cde2f4ff847c3ad1aec1e0004fe784d8f40f8ae87767f96"},{"id":"0x1f3994816bda3f26aff4abca5c5aa8ec3ec3d6e3d967790ec040d65e97ba49da"},{"id":"0xa2560f7607acce5502242161428b23f40ec369174a91cb07c13d18507d80996b"}]}}}
What I like to do is to make it look tidier by formatting it to one line.
query { starterEntities (first: 5, orderBy: CREATED_AT_DESC) { totalCount nodes { id } } }A neat trick I do is to copy this into VS Code and then “join lines”. Basically ctrl+J on a Mac.